ow to adjust your electric guitar six screw vibrato bridge.
In this article you will find
instructions and tips about the setting of
vintage style vibrato units on
electric guitars, with special regard to models used on strat or super-strat
instruments
. This is part of the general setup of the
guitar
, that involves topics covered on the Soundsation blog as intonation, pickup and action adjustments.
Before continuing you should
have:
All that verified, we can talk
about how to self-adjust a vibrato bridge with springs, also called
vibrato
arm
or tremolo, and even tremelo (somehow wrongly: in Italian
tremolo is a volume variation and vibrato a pitch variation,
whereas it seems in English these terms could be crossed):
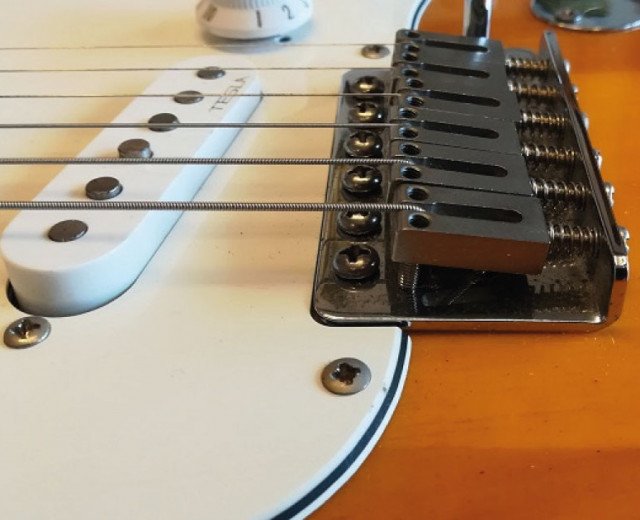
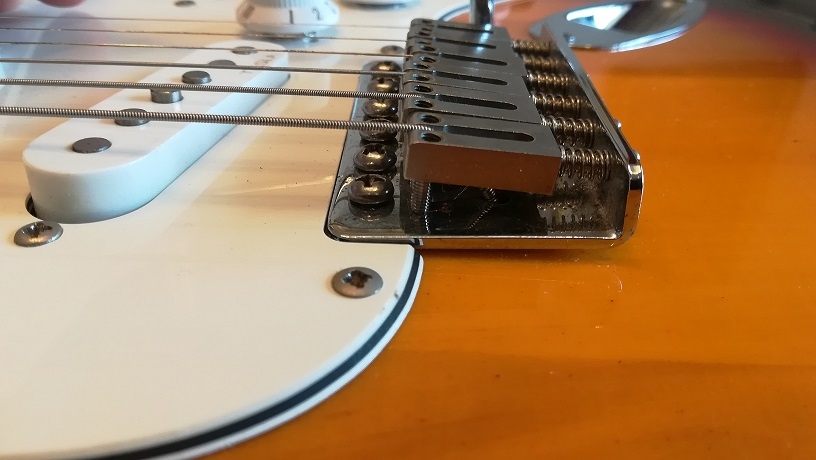
- six screw vintage style
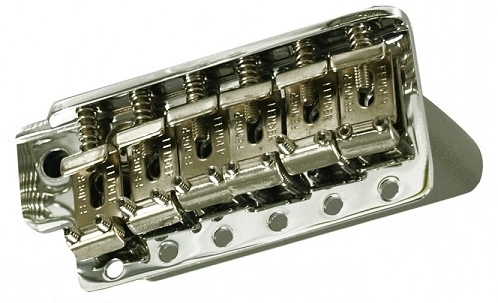
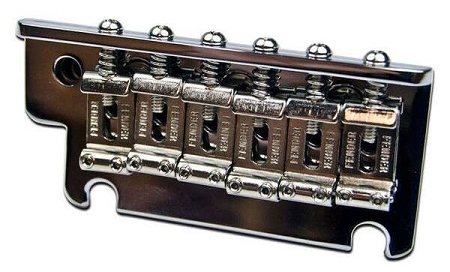
- floating with two studs or bolts or pivots (in the picture, a Fender
American Standard model)
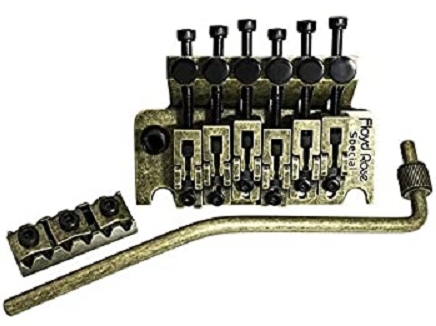
- floating and locking, with two pivots, a locking nut and fine-tuning knobs (in the picture, a Floyd Rose)
All mentioned kinds can have matched locking tuners that clamp strings inside the shafts and prevent tuning loss (within
certain limits). In
Floyd Rose derived models there is a string locking
nut. In this article we concentrate on the classic
Fender vintage school
vibrato
.
Elsewhere on the Soundsation blog I deal with floating bridges as the Floyd Rose and the Wilkinson,
besides historical models as the Bigsby and the Gibson Vibrola.
The “synchronized tremolo”
Let's start from the beginning, that is from the
Fender
“synchronized tremolo” system due to Leo Fender's
dedication and to country guitar player
Bill Carson's guide in the
Stratocaster development.
This kind of vibrato is so popular and well-known that
I am not going into a detailed description. It is sufficient to remember that
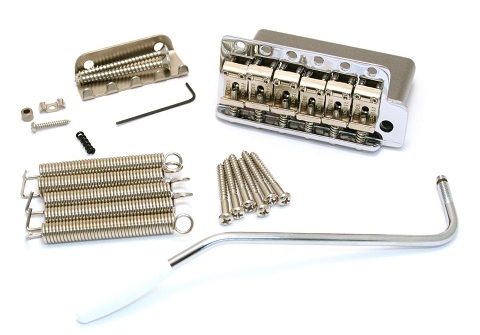
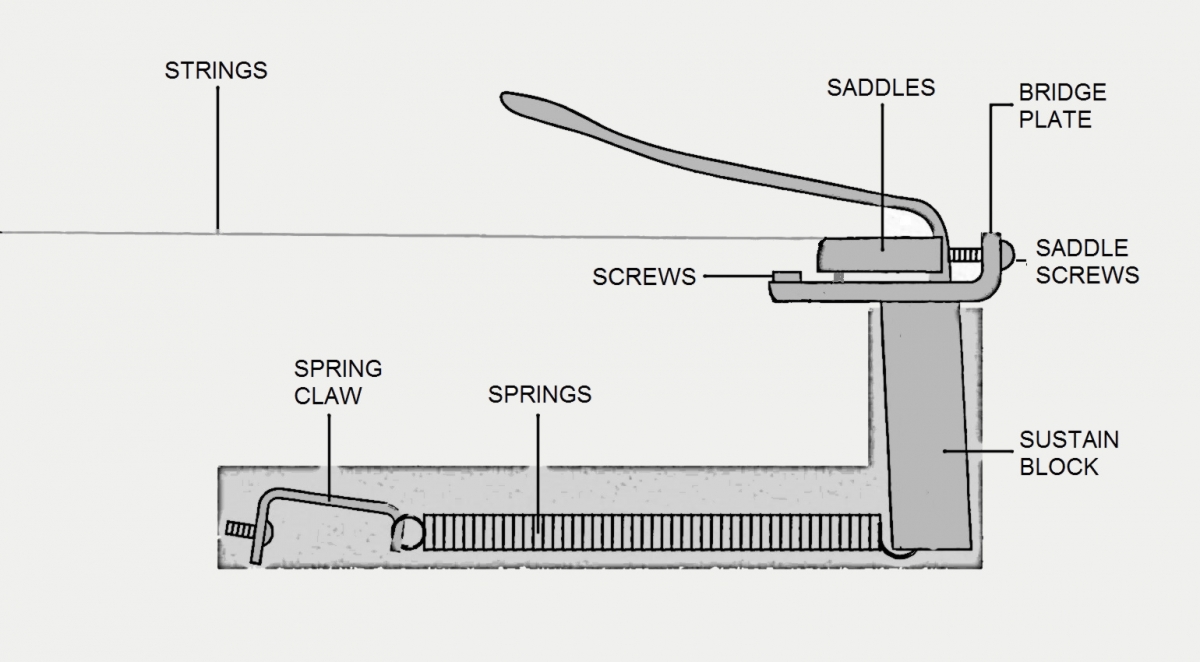
the base plate tilts on
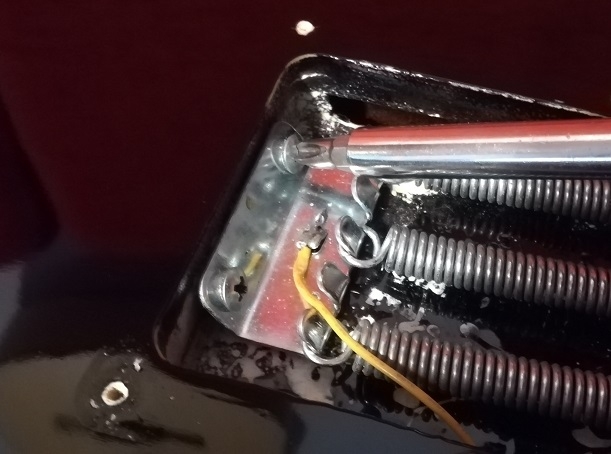
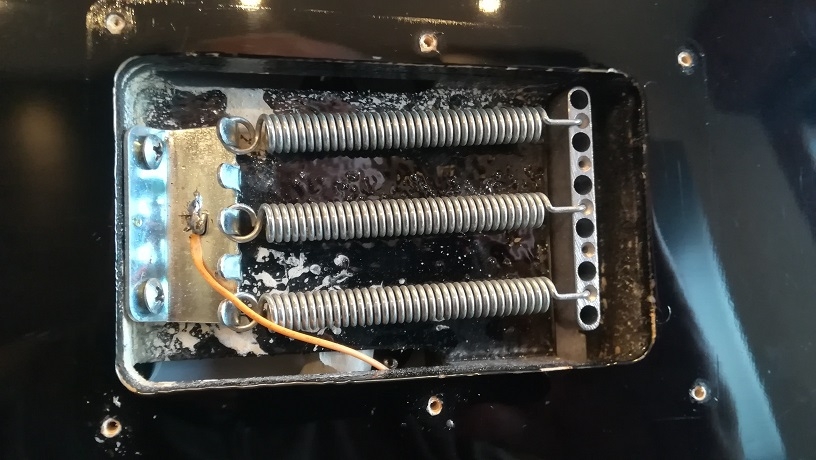
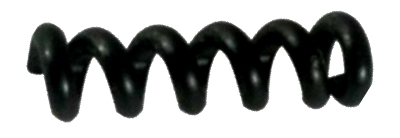
six screws. A number of two to five springs
connects the sustain block (a metal body that is screwed under the
vibrato plate) and the guitar body by means of a metal piece with five claws. A
lever or
arm is inserted into the vibrato body and makes it possible to
loosen string tension and lower the tuning in a synchronous way.
Parts and materials of a vibrato
In the world of electric guitar there isn't a device
with a more undefined and “unregulated” setup, since each guitar player can set
it up according to his preferences. So I shall suggest a generally accepted
coarse
adjustment
, that is however subject to variations.
In relation to the six screws, they can be adjusted
too: tighten them until they are aligned onto the
bridge plate, then
unscrew for about a quarter of turn. You can unscrew even more the central
screws but slightly. Somebody prefers to remove them totally and let the two
outer screws make the work. Generally they are able to stand up the stress and
the vibrato behaviour resembles a two pivot floating
smoothness and
consistency
.
The more the bridge plate is well worked and the edges
are well shaped, the better your vibrato will perform. Some countersink bevels
around the back plate holes, those in contact with the guitar body, thus making
the hole border to screw contact similar to a
knife edge one.
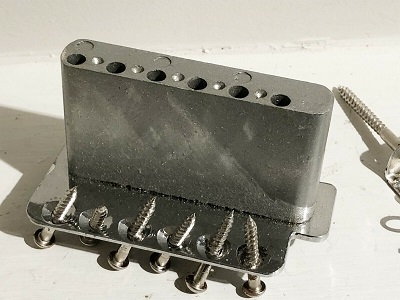
Some sustain blocks are thinner than vintage style ones to allow arm use in both directions preventing it touches the guitar body inside the spring hole. It should be remembered that the sustain block material and mass , as well as the saddle ones, are very important towards the sound. Steel is mostly appreciated, but brass and zinc alloy are used too; pressed metal powder can be found in cheaper models.
The overall quality of a vibrato bridge, including springs, is fundamental to get a quality
sound
; it has to do with the general tone, the vibration transmission
velocity and the
sustain.
The quality of the screws and hole machining are
important too, especially for the performance smoothness and precision.
On this '50s born remarkable vibrato bridge,
instrument action and intonation can be setup acting on six individual saddles,
as you may have read in the articles “
The setup of yourguitar (Pt.3) – How to adjust your guitar action based on the kind of bridge” and “The setup of yourguitar (Pt. 4) – Setting intonation”. Before doing this we have to decide how many springs we are going to
use and how we will set the bridge over the top of the guitar. This will
influence string tension, vibrato action and the sound of your
strat styleinstrument.
Factory “total setup” process
Let's start from a Fender factory practical system for
the
vibrato bridge installation on a brand new Stratocaster.
First of all consider that a decent vibrato bridge is
usually sold with factory pre-set saddle positions that give an approximated
intonation for
.009-.042 and .010-.046 strings. We need a wood piece measuring about 25x50 millimetres, with a
sloping thickness from about 6 to 12 mm: in short,
a wedge. If
you are a willing and convinced strat-fan, you'd better get one or have it made
by a craftsman.
The instrument should have strings put on and a movable capo placed at the first fret if the nut has not been finished yet. The
bridge screws have to be set as described above. Springs are not installed yet
and the claw should be at about 25 mm from the hole body edge.
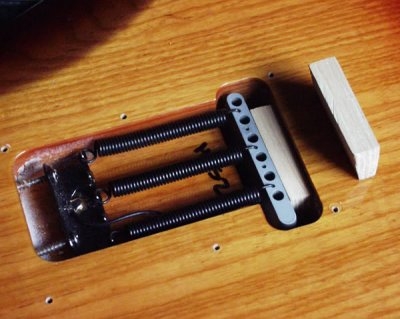
Insert the wood wedge between the sustain block and
the guitar body, thus leading the wedge in a
centered and orthogonal
position
compared to the longitudinal axis of the guitar. Tune the strings
and make the wedge slide in and out until the distance between the tilted
bridge base and the guitar top is about 2 mm. Tune again. Now you can adjust
neck relief, then action and finally remove the capo. At Fender they remove it
at this point because they still have to cut the nut, but we can take it away before
relief and action setups if the guitar is already completed. We could even
avoid using a capo.
At this point you can adjust the pickups as
showed in the article “
The setup of yourguitar (Pt 5) - Setting single-coil pickups”.
Once all these things have been done, you can finally
install the springs.
Start installing three springs, placed parallel
to each other from the block holes to the corresponding claws. Gradually tighten the two
spring extending screws until the wedge finally drops down. Done!
At this point you can recheck tuning, relief,
action and intonation of the guitar
.
Take what you need from this procedure on a case by
case basis, skipping what you have already done. No need to say the wood wedge
can be redundant for already assembled guitars.
The same setting way can be used for the two pivot
American Standard vibrato.
Renowned guitar players and
springs
Are these “rules”? Not a chance! Seventy years of
Stratocaster and
similar guitars accustomed us to see several settings of the distance between
the
vibrato plate and the guitar top, in addition to a variable
number of springs
, from two to five, or even just one (when the bridge is
kept laying on the top and the sustain block is fastened by a wood piece, as in
Eric Clapton's early style Strat).
Not “certified sightings”, but Ritchie Blackmore
of Deep Purple used five springs and kept the bridge heavily slanted in order
to rise as well as to lower the tuning.
Jimi Hendrix and Stevie Ray
Vaughan
used five springs too, but they kept the bridge flush onto the
guitar top, just like the early
Eddie Van Halen to get his “dive
bombing”. Five springs really is a high number of springs and applies a
remarkable tension to strings and guitar. Personally, I remain with three
springs, though somebody installs just two, angled from the outer holes of the
sustain block to the centre hooks of the claw. Not only:
after-market
springs can have different lengths
and somebody changes them based on their
number.
Generally, we can say that two or three standard
springs are OK if we make a musical and intense use of the vibrato arm. If we
use it as a colour or occasionally, three or four springs are possible. Number
3 makes sense, not by chance Fender bases its
factory setup on it, using
.009-.042 strings on Standard models and .010-.046 on Vintage ones.
Renowned guitar players and
inclination
Let's talk about bridge inclination on the guitar top.
As you read before, a couple of millimetres is the factory standard at Fender,
but a guitarist as
Jeff Beck, who has made vibrato a fundamental feature
of his style, keeps his American Standard bridge tilted up at 5 mm over the
top, in order to easily use the arm both to raise and lower pitch. In
particular, Beck wants to get a whole step increase of the fourth string
fretted at the third fret (from
F to G).
Another vibrato “obsessed” is Scott Henderson,
who sets his bridge in order to get a major third increase of the third string
(
G to B) when he pulls the arm up and an octave drop of the fifth
string when he pushes the arm down.
Well, if you don't want to live holding a tuner, a screw-driver and a caliper in your hands, trust the adjustment I’m
suggesting, good for a general use and as a starting point for personal
updates: I suggest an increase of
“almost”
a whole step pulling up the arm while playing a D# at the fourth fret on the
second string
; if it goes a whole step up it is certainly not a problem.
Should you have not much interest in vibrato and can't
stand hearing all the strings going flat while you are
bending one
(remember the whole system is in a synchronized but floating balance), keep the
bridge steady flat onto the guitar top.
Little cares to enjoy a good
vibrato
Besides choosing a good build quality model,
here are some suggestions to get an
optimal operation from your vibrato:
- the nut has to be perfectly crafted for the string gauge you are
using; a
luthier is essential for a good result
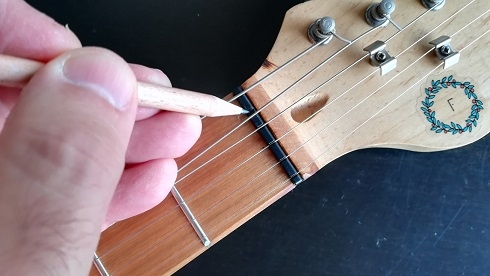
- it is very useful the
nut to be a
self-lubricating graphite-based one; bone or common
plastic nuts should be regularly lubricated running
a pencil in the
slots.
- strings have to be correctly wound on tuners; keeping the strings clean and lubricated with a specific product can help
- tuners have to be efficient and without backlash, that is they should
not return back (not even imperceptibly) after tuning
- saddle pilots for strings have to be well made and bevelled
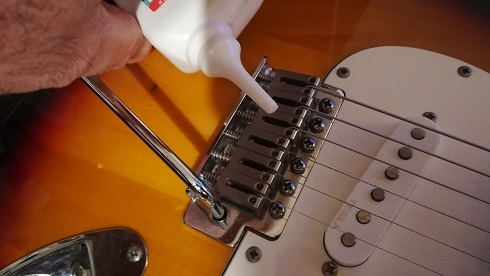
- sometimes, for
example when you change strings, it is recommended to drip a little sewing
machine
oil in the saddle string grooves
- periodically tighten the screws that join the sustain block and the bridge plate
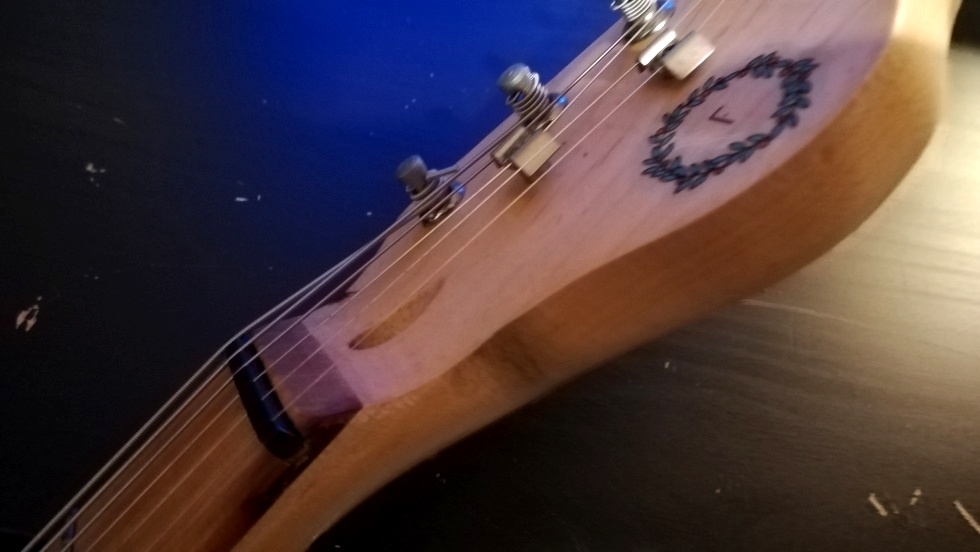
- the string trees on the headstock should be set in order to make tilted strings
as parallel as possible after the nut; a little oil helps every now and then
- a new guitar vibrato arm (or tremolo arm) hole is usually closed by a sticker that keeps a tiny
counter-thrust
spring inside; use this one to find a personal position
- if the above mentioned spring is lacking or as an addition, you can adjust the arm friction with old DIY techniques, such as adhesive tape or raffia or twine strands loosely wrapped around the threaded end of the arm, without exaggerating in order not to spoil the thread.
Do not renounce quality
Well, this is not all about vintage style six screw
vibrato, but is already much. If you are beginning with an inexpensive
instrument, do not give up
quality, such as that offered by Soundsation guitars.
There is a great market of accessories and spare parts
made for the Stratocaster vibrato, from different length and angle arms to
so-called
tremsetter devices, that optimize its function.
Be sure to experiment your solutions and search the net for reliable tutorials. This is just part of the story, as you can always read on our fabulous blog.
Fabrizio Dadò
References:
D.Erlewine, Guitar Player Repair Guide - Miller Freeman Books,
1990.